DIY Bike Maintenance: Essential Skills
Weekend rider or daily commuter? Knowing how to perform basic maintenance can save you time, money, and unnecessary trips to the bike shop. Here’s the run-down on some of the basics you need to keep your bike running smoothly.
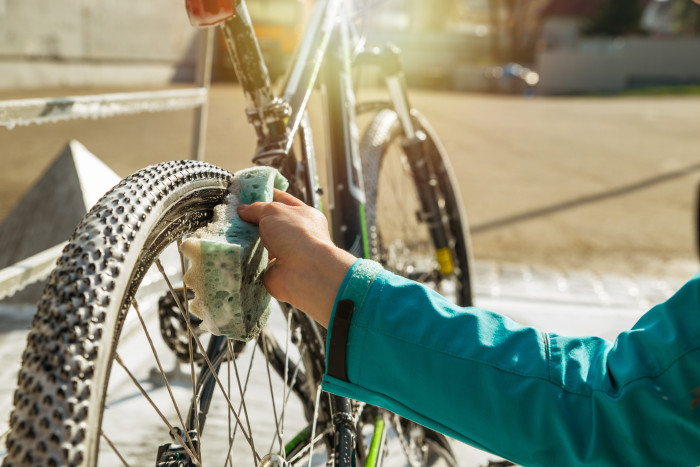
1: Basic Bike Cleaning
Cleaning the Frame and Components
Keeping your bike clean isn't just about aesthetics—it’s about function. Dirt, grime, and road debris can cause wear and tear on your bike’s components, leading to poor performance and potential breakdowns.
- Gather Your Tools: You'll need a bucket, warm water, mild detergent, a sponge, a soft brush, and a degreaser for the drivetrain. Avoid high-pressure hoses, as they can force water into the bearings and other delicate areas.
- Clean the Frame: Start by rinsing your bike with water to remove loose dirt. Use a sponge and soapy water to clean the frame, paying attention to areas like the bottom bracket and fork. Rinse and dry with a clean cloth.
- Clean the Drivetrain: Apply a degreaser to the chain, cassette, and chainrings. Use a brush to scrub away the dirt. Rinse with water and dry the components with a cloth.
- Final Touches: Inspect the bike for any stubborn dirt. Then turn your attention to your wheels, brakes, and other components using a soft brush.
Lubricating the Chain
A well-lubricated chain is key to a smooth - and quiet! - ride. Regular lubrication reduces friction, prevents rust, and keeps your drivetrain going for longer.
- Choose the Right Lubricant: There are different types of lubricants, but a wet lube is good for rainy conditions, while a dry lube works best in dry, dusty environments.
- Apply the Lubricant: After cleaning your chain, apply a small amount of lube to each link while rotating the pedals backward. Be careful not to over-lubricate, as excess lube can attract dirt.
- Wipe Off Excess: After applying the lubricant, wipe off any excess with a clean cloth. This helps prevent dirt from sticking to the chain.
2: Tyre and Tube Maintenance
Fixing a Flat Tyre
A flat tyre is an inevitable part of cycling and knowing how to fix it can get you back on the road quickly.
- Remove the Wheel: If you have rim brakes, release the brake to remove the wheel. For quick-release wheels, simply open the lever and remove the wheel from the frame or fork.
- Remove the Tube: Use tyre levers to carefully remove one side of the tyre from the rim. Once off, pull out the inner tube.
- Check for Damage: Inspect the tyre and tube for sharp objects like glass or thorns. If you find anything, remove it to prevent another puncture.
- Replace the Tube: Inflate the new tube slightly and place it inside the tyre. Push the tyre back onto the rim, starting at the valve and working your way around. Reinflate the tyre to the recommended pressure.
- Reattach the Wheel: Place the wheel back on the bike, secure the quick-release, and reconnect the brake.
Checking Tyre Pressure
Proper tyre pressure ensures a smooth ride and helps prevent flats.
- Check Regularly: Use a pressure gauge to check your tyre pressure before every ride. Road bike tyres typically require 80-130 psi, while mountain bike tyres need 30-50 psi.
- Inflate as Needed: Use a bike pump to inflate your tyres to the recommended pressure. This ensures optimal performance, comfort, and puncture resistance.
3: Brake Adjustment and Maintenance
Adjusting Brake Pads
- Inspect the Pads: Check your brake pads for wear. If they’re worn down to the wear line or uneven, it’s time to get them replaced.
- Align the Pads: Loosen the brake pad bolts and adjust the pads so they’re parallel to the rim and make full contact when the brake lever is squeezed. Ensure there’s a small gap between the pad and rim when not braking.
- Test the Brakes: After adjusting, squeeze the brake lever to ensure the pads contact the rim evenly.
Checking Brake Cables
Brake cables can stretch and wear over time, leading to less responsive braking.
- Inspect the Cables: Look for frayed or corroded cables. If the cables show signs of damage, get them replaced.
- Replace Worn Cables: If needed, remove the old cable and feed the new one through the housing. Secure it to the brake caliper and adjust the tension for optimal braking performance.
4: Gear and Drivetrain Maintenance
Adjusting Derailleurs
Smooth shifting is a must for a good ride, and that starts with well-adjusted derailleurs.
- Adjust the Limit Screws: The limit screws control how far the derailleur moves. Adjust them to prevent the chain from shifting off the gears.
- Fine-Tune the Cable Tension: Use the barrel adjuster to fine-tune the shifting. If the chain resists shifting up, increase tension. If it struggles to shift down, decrease tension.
- Test the Shifting: Shift through all the gears to ensure smooth transitions and adjust as necessary.
Cleaning and Lubricating the Drivetrain
Keep the drivetrain clean for smooth and efficient power transfer.
- Clean the Drivetrain: After a ride, especially in wet conditions, clean the chain, cassette, and chainrings with a degreaser.
- Lubricate the Drivetrain: Once clean, apply lubricant to the chain and wipe off any excess.
5: Basic Adjustments for Comfort
Adjusting Saddle Height and Position
- Find the Right Height: With your bike on a flat surface, sit on the saddle and pedal backward. Your leg should be nearly straight at the bottom of the pedal stroke.
- Set the Saddle Position: The saddle should be level and positioned so your knee is directly above the pedal axle when the pedals are horizontal. This prevents knee pain and improves efficiency.
Handlebar and Stem Adjustments
- Adjust Handlebar Height: Raise or lower the handlebars to a comfortable height. For most riders, the bars should be level with or slightly below the saddle.
- Set the Handlebar Angle: Adjust the angle of the bars so your wrists are comfortable and you can easily reach the brake levers.
- Test for Comfort: Go for a short ride to ensure the adjustments feel right and then fine-tune as needed.
Basic bike maintenance are skills worth mastering to not only keep you safe on the roads but also to prevent potentially expensive trips to the ‘bike hospital’!